π导航 
【首页】
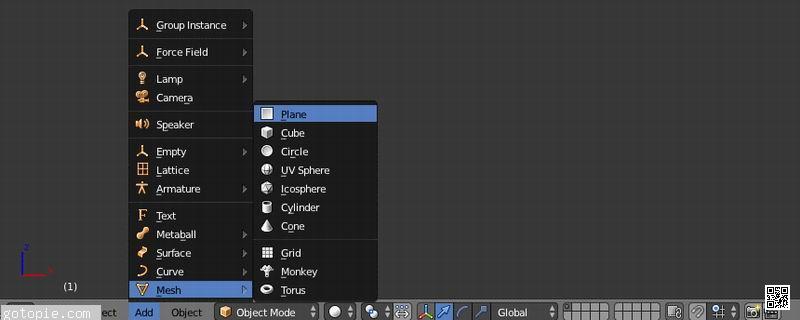
Blender游戏引擎教程:α纹理GLSL【2026-07-14】 【  Blender 游戏引擎教程 1. 选择引擎: Blender Game Info menu >> Render Engine box >> Blender Game 有些菜单只有在Blender游戏渲染引擎被选中时才可用。 2. 设置视窗阴影: Texture 3D View menu >> Viewport Shading box >> Texture 纹理视窗阴影会渲染你添加的带有纹理游戏对象 3. 选择材料阴影: GLSL Properties menu >> Render button >> Shading tab >> GLSL button Alpha纹理也适用于多纹理 4. GLSL设置 Enable: Lights Enable: Shaders Enable: Shadows Enable: Environment Lighting Enable: Ramps Enable: Nodes Enable: Extra Textures 只有当渲染引擎:Blender游戏被选中时,才会出现GLSL设置。 5. 添加一个平面 3D View menu >> Add >> Mesh >> Plane 在本教程中,我使用一个平面来显示alpha纹理。
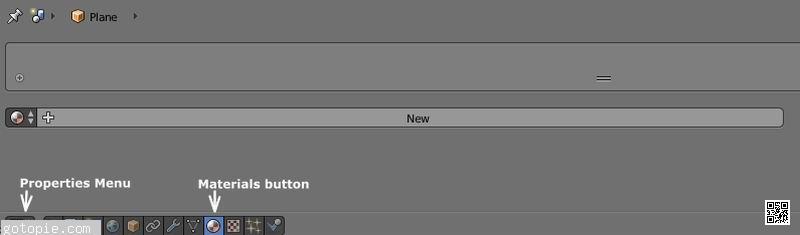
6. 添加一个材质. Properties menu >> Material >> New
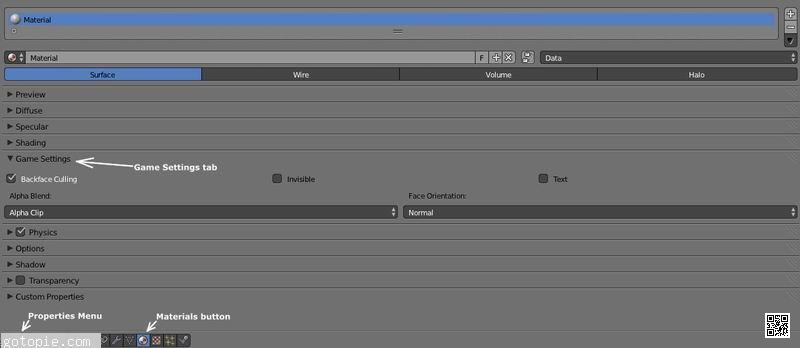
7. 选择α混合: Alpha Clip Properties menu >> Material >> Game Settings Alpha Blend >> Alpha Clip 不透明的:渲染纹理面颜色为颜色 添加:渲染脸部透明,添加脸部颜色 αAnit-Aliasing:使用Alpha通道作为抗混叠掩模 阿尔法混合:使用纹理alpha值混合 α片段:使用没有混合的纹理alpha值 α排序:为正确的alpha绘图排序面
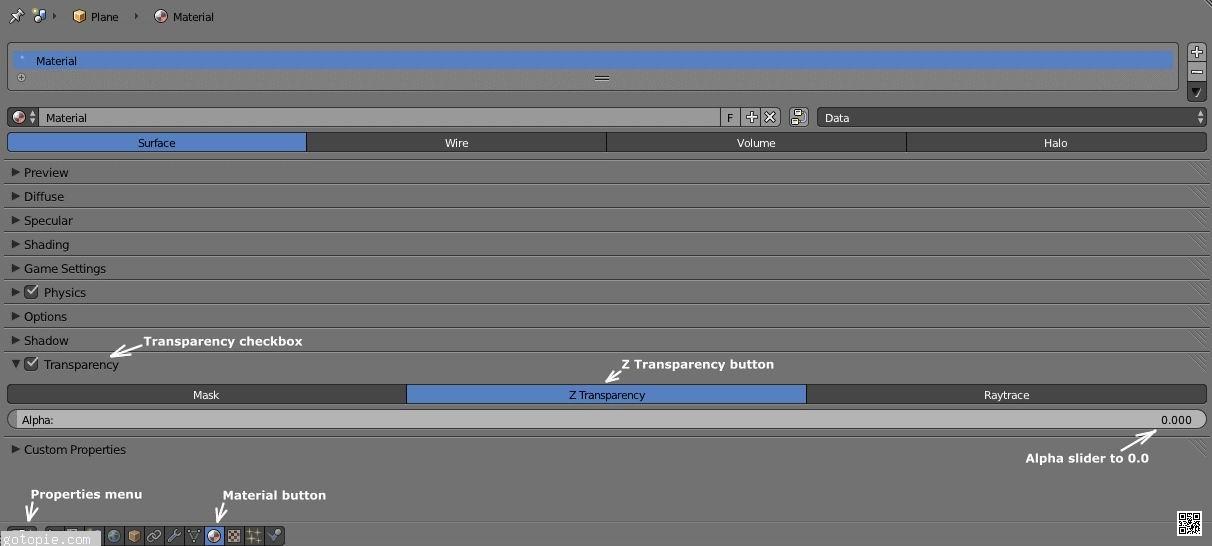
8. 设置透明 Properties menu >> Material >> Transparency checkbox 选择Z透明按钮 将Alpha滑块设置为0.0 设置透明将使游戏对象的材质透明
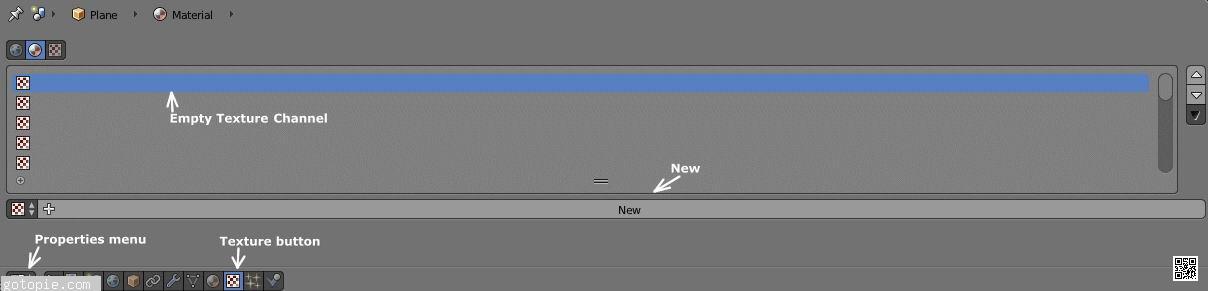
9.为材质添加纹理通道 Properties menu >> Texture Select an empty Texture Channel >> New
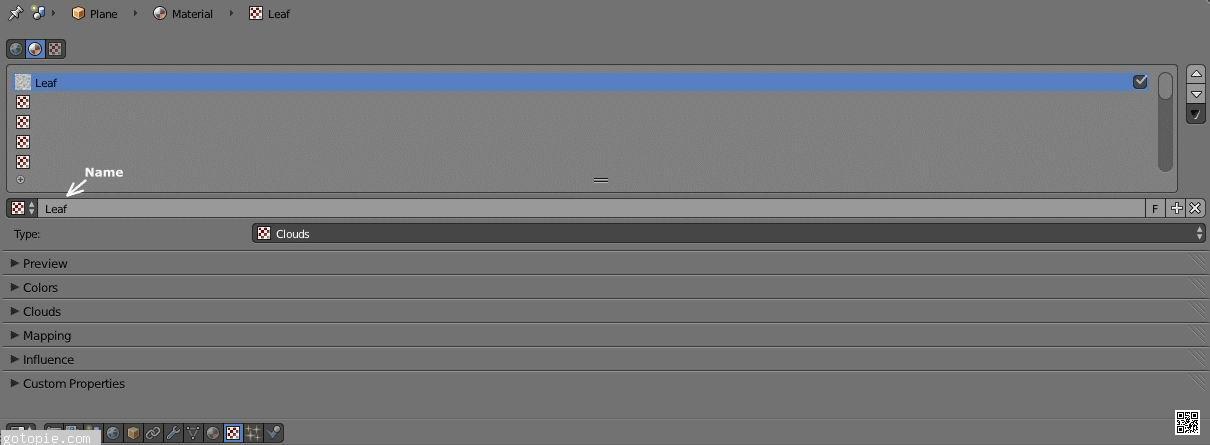
10. 给纹理通道一个唯一的名字 Properties menu >> Texture >> Name 在本教程中,将它命名为Leaf
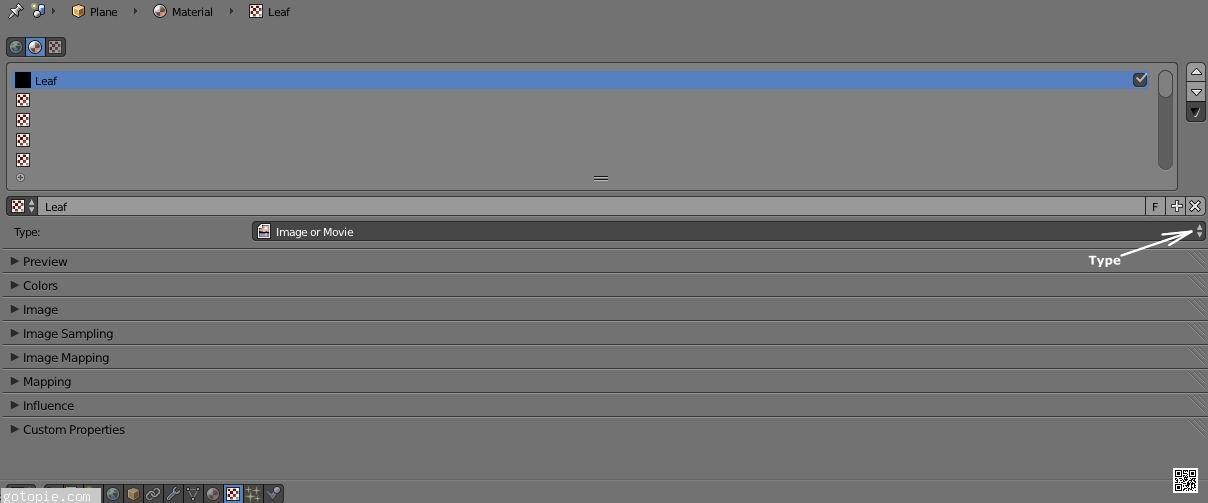
11. Texture Type: Image or Movie Properties menu >> Texture >> Type >> Image or Movie
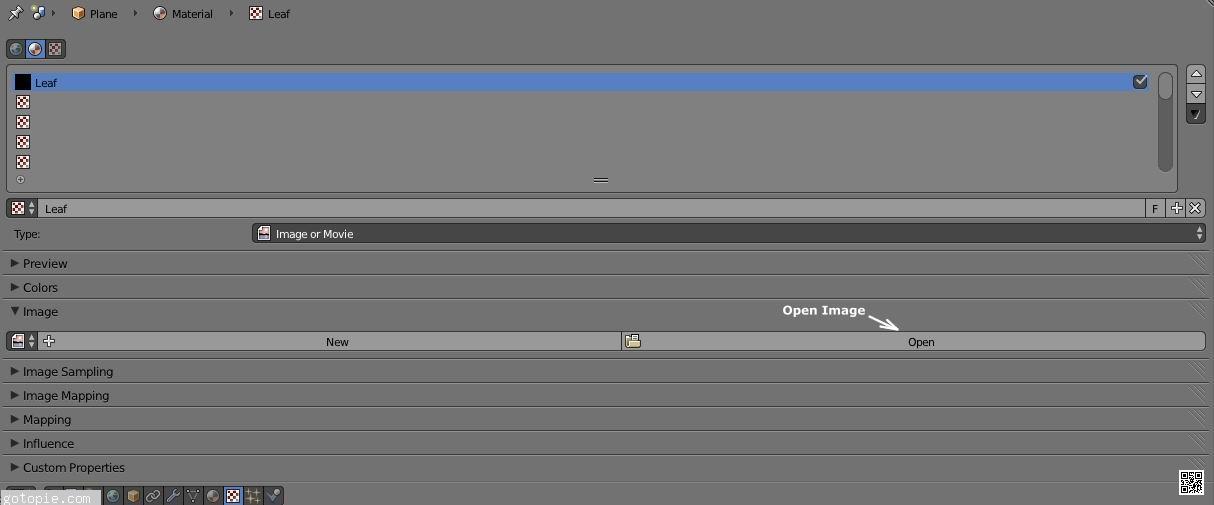
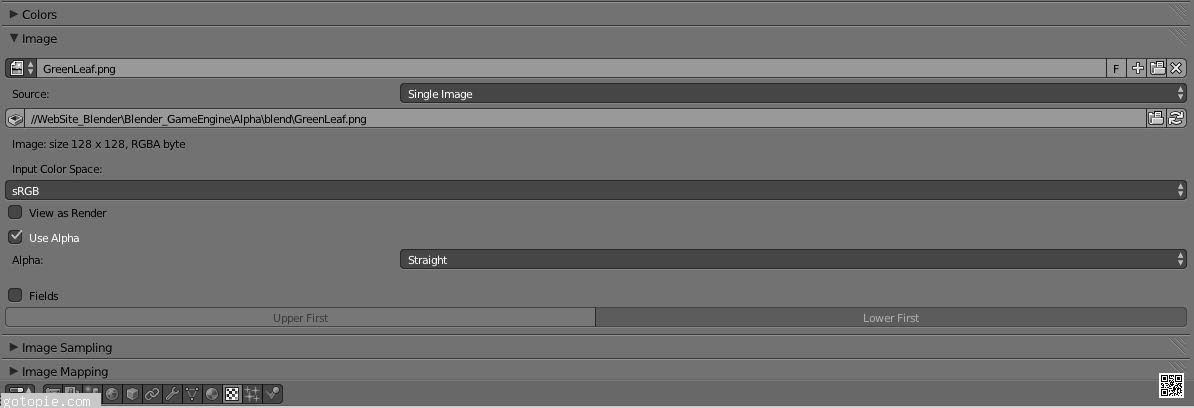
12. 加载带有alpha通道的纹理(RGBA) Properties menu >> Texture >> Image >> Open
从你的硬盘上下载 注意:在本教程中,使用了一个名为GreenLeaf.png的RGBA纹理。 Download: GreenLeaf.png
13. 使用Alpha复选框 Properties menu >> Texture >> Image
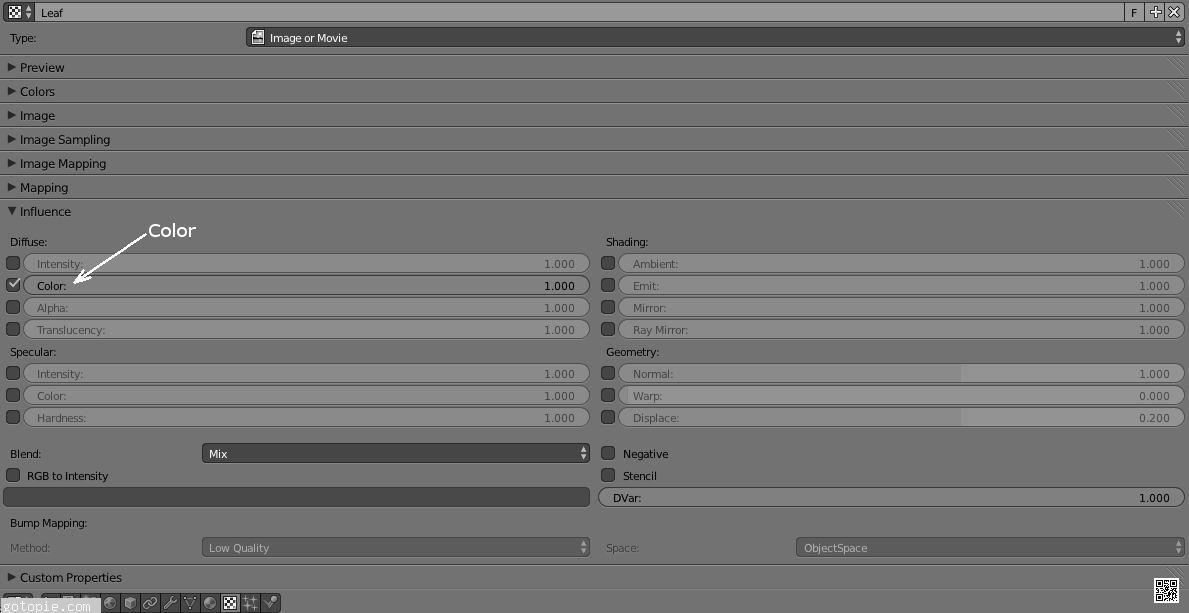
14. 设置漫反射颜色为1.0 Properties menu >> Texture >> Influence Diffuse: Color 1.0
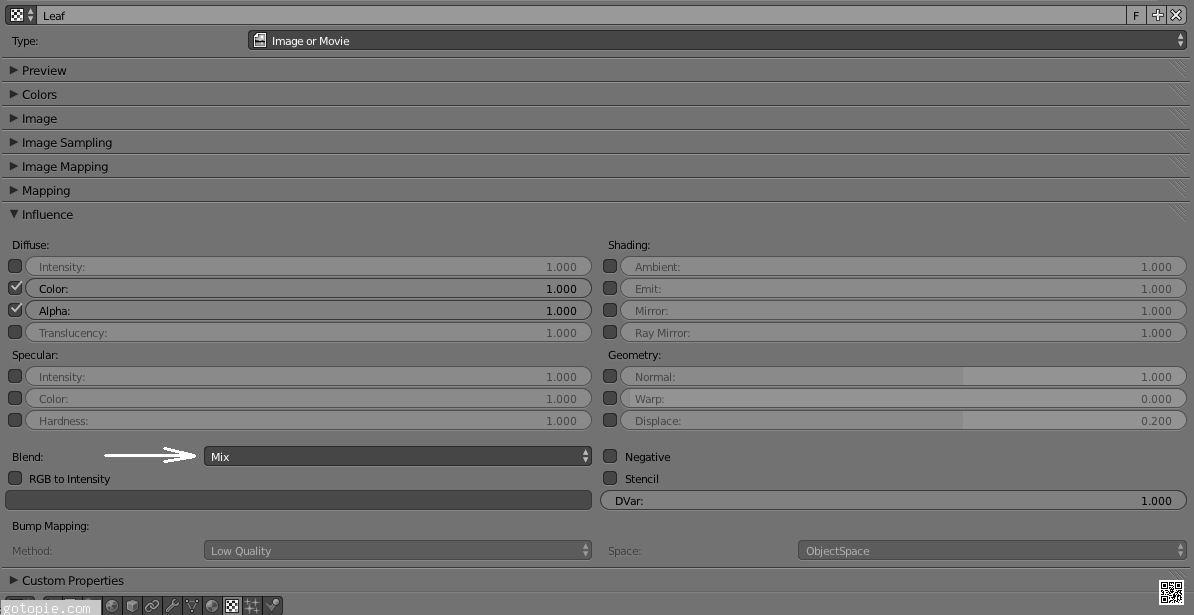
15.设置漫反射Alpha为 1.0 Properties menu >> Texture >> Influence Diffuse: Alpha 1.0
16. 设置混合为MIX Properties menu >> Texture >> Influence Blend: Mix
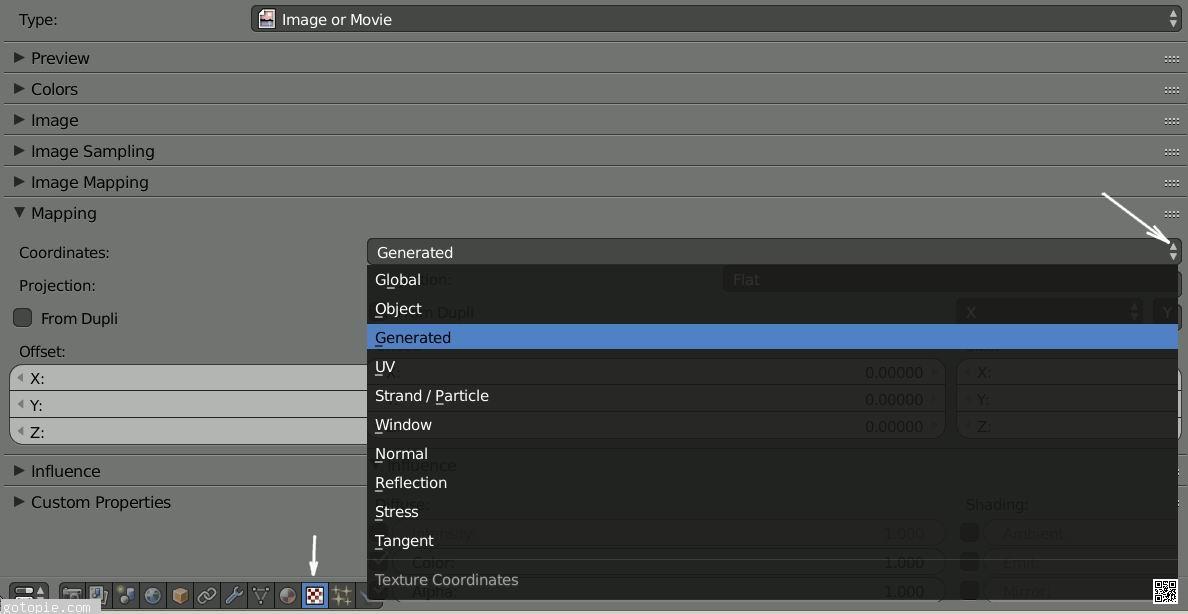
17. 纹理映射坐标:生成 Properties menu >> Texture >> Mapping >> Coordinates: Generated 注意:还有其他方法可以将纹理映射到平面。 由于我们将一个纹理映射到一个平面,这是最简单的。
18. 启动游戏引擎 Info menu >>Game >> Start Game Engine
|


copyright©2018-2026 gotopie.com