π导航 
【首页】
Blender游戏引擎教程:创建一个实时镜子【2026-05-03】 【  Blender 游戏引擎教程 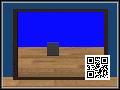 1. 渲染引擎: Blender游戏 Info menu >> Render Engine box >> Blender Game 注: 只有当选择了Blender Game渲染引擎时,有些菜单才可用。 2. 视口着色:纹理 3D View menu >> Viewport Shading box >> Texture 注: 纹理视口着色使用添加的纹理渲染游戏对象。 3. 材质着色: GLSL Properties menu >> Render button >> Shading tab >> GLSL button 注: 实时镜像还可用于材质着色:多纹理 4. 启用GLSL设置 Properties menu >> Render button >> Shading tab Enable Shaders Enable Shadows Enable Lights Enable Color Management Enable Ramps Enable Nodes Enable Extra Textures 注: 选择Blender游戏引擎后,GLSL设置才会出现 5. 添加一个平面用作镜子 3D View menu >> Add >> Mesh >> Plane 注: 本教程中,我们使用平面作为镜子 也可以不使用平面,可以使用任何网格游戏对象。 6. 给平面起一个唯一的名称 Properties menu >> Object button >> Name box >> Mirror 注: 索性可以命名为Mirror(镜子). 7.为镜子创建一个空的UV贴图 Properties menu >> Object Data >> UV Maps >> + button 注: 使用UV贴图可以在游戏对象上定位纹理。 添加纹理后,我们将使用此UV贴图将其映射到游戏对象。 8. 给UV贴图一个唯一的名称 Properties menu >> Object Data >> UV Maps Name box >> Mirror_UV 注: 双击旧名称,重命名 这里命名为 Map Mirror_UV 9.添加一个材质到镜子 Mirror selected: Object mode
Properties menu >> Material button >> New bar 10. 给材质一个唯一的名称 Properties menu >> Material button >> Name box 注: 这里命名为: Reflect(反射) 11.将材质设置为无阴影 Properties menu >> Material button Shading tab >> Shadeless checkbox 注: 不必将材质设置为无阴影。 高反射面(镜子)通常设置为无阴影。 低反射表面(抛光木材等)通常不会设置为无阴影。 12.添加纹理到材质 Properties menu >> Texture tab >> New 13. 给纹理一个唯一的名称 Properties menu >> Texture tab >> Name box 注: 这里命名为Reflection(反射) 14. 纹理类型设置为Image or Movie Properties menu >> Texture tab Type >> Image or Movie 15. 加载纹理 Properties menu >> Texture button >> Image tab >> Open 从硬盘加载 注: 这里使用名为mirrorreflection.png的纹理。 mirrorreflection.png是向后镜像的文本图像,因此要正确地对纹理进行UV映射。 你可以不必这么做。你可以使用任何你想要的图像。 16.纹理映射坐标: UV Properties menu >> Texture button >> Mapping tab >> Coordinates: UV 注: 对模型进行UV展开,并使用Blender的UV/图像编辑器映射纹理。 17. 选择UV贴图: Mirror_UV Properties menu >> Texture button >> Mapping tab >> Map
UV Map List >> Mirror_UV 注: 使用步骤7中创建的UV贴图,将纹理应用于游戏对象。 18. UV展开平面 3D View >> Select Plane named Mirror 3D View menu >> Mode box >> Edit Mode 3D View menu >> Select >> Select/Deselect All >> Select All 3D View menu >> Mesh >> UV Unwrap >> Reset 注: 因为这是一个只有一面的平面,所以我们可以使用“重置”对其进行UV展开。 还有其他方法可以用紫外线将其打开,但这是最简单的方法。 19. UV/图像编辑器:设置活动的UV贴图 UV/Image Editor menu >> Active UV Map box >> Mirror_UV 20. UV/图像编辑器:选择图像 UV/Image Editor menu >> Image List >> MirrorReflection.PNG 21. UV/图像编辑器: 选择所有顶点 UV/Image Editor >> Select >> (De)select All 22. UV/图像编辑器: 以X轴为镜像 UV/Image Editor >> UVs >> Mirror >> X Axis 注: 必须在X轴上镜像UV顶点。 这样可以使镜子正确地反射图像。左边就是左边。右边就是右边。 23. 在文本编辑器中打开mirror.txt Text Editor >> Text >> Open 注: mirror.txt是一个python脚本。 该脚本可作为文本文件下载,因为某些Internet提供商不允许将该脚本作为python文件下载。 24. 重命名为mirror.py Text Editor menu >> Name box 注: 您不必重命名它 您可以将其保留为mirror.txt 25. 选择用作镜像的游戏对象 3D View >> Select the game object 26. 添加Always传感器 Logic Editor >> Sensors >> Add Sensor >> Always 激活真电平触发(脉冲模式) 注: mirror.py必须运行每个帧 27. 添加python控制器 Logic Editor >> Controllers >> Add Controller >> Python
执行方法:脚本 注: mirror.py是一个python脚本 您需要一个python控制器来运行python脚本 28. 选择Mirror.py Logic Editor >> Controllers >> Python Controller Script >> Script List >> Mirror.py 注: 之前,我们在文本编辑器中打开了mirror.py 将mirror.py添加到游戏引擎的python脚本列表中 29. 向镜像添加游戏属性 Logic Editor menu >> View >> Properties Properties tab >> Add Game Property button 注: 添加一个游戏属性,它将被python脚本用作变量。 这样我们就可以为游戏中的所有镜像使用一个(并且只能使用一个)python脚本。 30. 游戏属性 Logic Editor >> Properties tab >> Property Name: material Logic Editor >> Properties tab >> Property Type: String Logic Editor >> Properites tab >> Property Value: Reflect 注: 属性名必须为Material。 mirror.py中的代码查找名为material的字符串属性。 Reflect射是我们命名的材料。 31. 连接逻辑块 Always Sensor >> Python Controller 注: 要连接逻辑块,请将“线”从一个逻辑块输出拉到另一个逻辑块输入 32. 启动游戏引擎 Info menu >> Game >> Start Game Engine |
copyright©2018-2026 gotopie.com